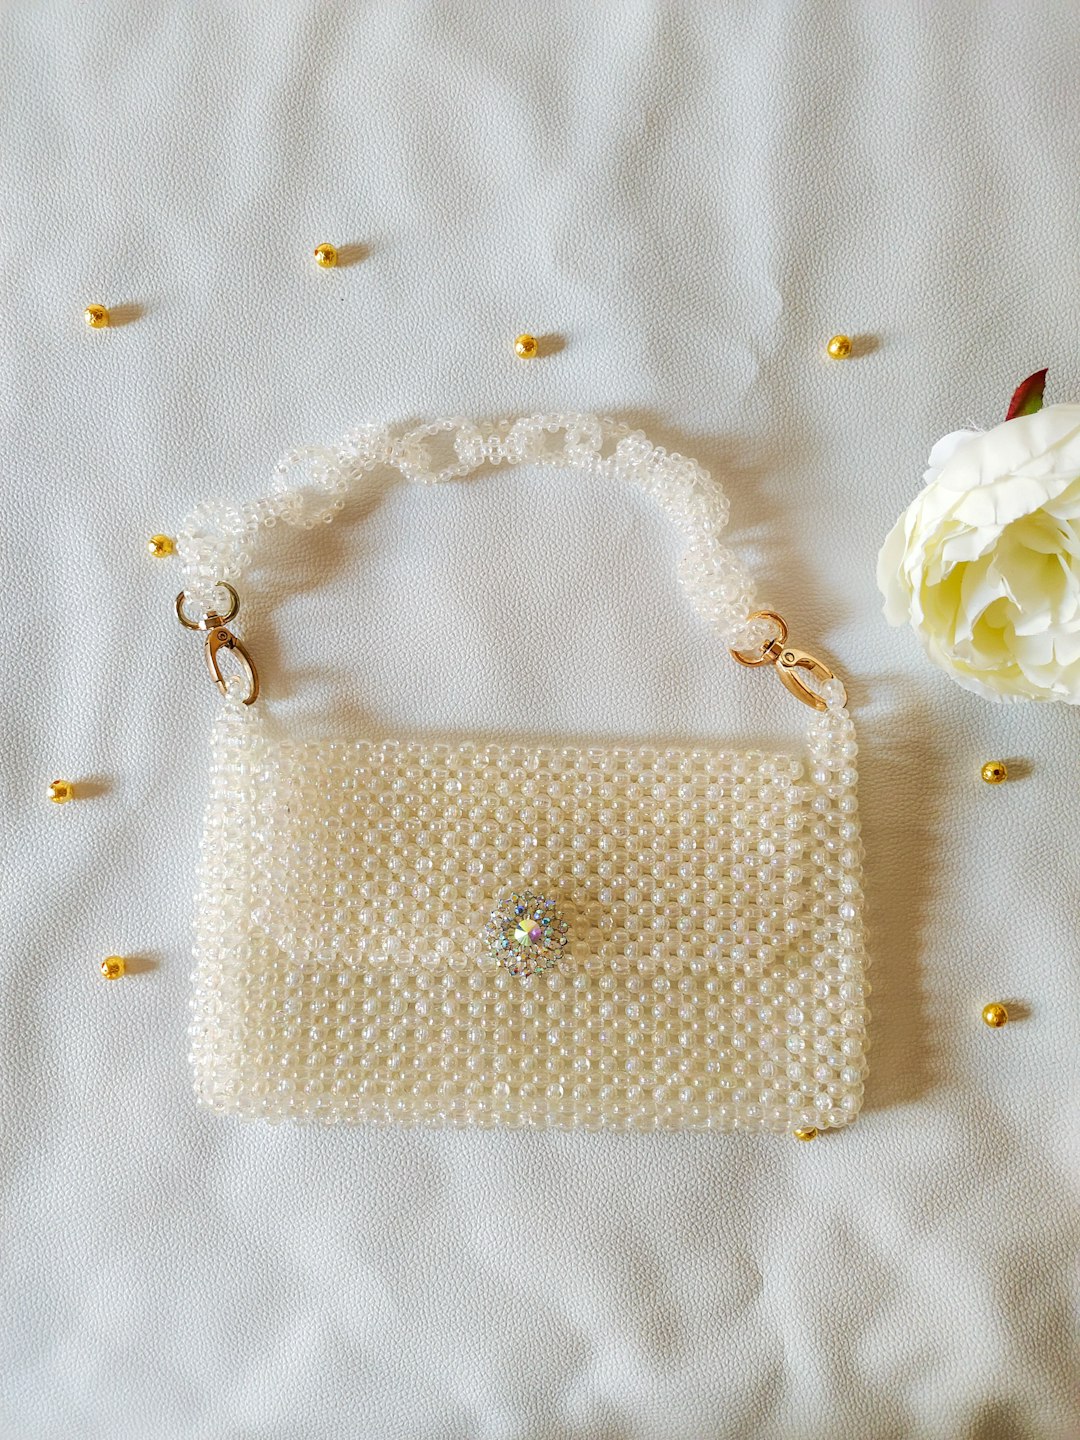
Category: DIY Tutorials

Step-by-step tutorials and techniques for making handmade bags and crafts.

  • How to Design Your Own Handmade Beaded Bag

    How to Design Your Own Handmade Beaded Bag

    Designing your own handmade beaded bag is a creative way to turn a simple idea into a unique accessory.

    Instead of copying an existing design exactly, you can choose the shape, size, colors, beads, handles, and decorative details that match your personal style.

    However, a beautiful handmade beaded bag usually starts with good planning.

    Before you begin threading beads together, it is helpful to have a clear idea of what you want your finished bag to look like.

    In this guide, you will learn how to plan and design your own handmade beaded bag step by step.

    Before starting your design, make sure you understand the basic materials needed for a beaded bag project. You can check Handmade Bag Materials Checklist for Beginners to prepare your supplies.


    1. Start With the Purpose of Your Bag

    The first step is to decide what type of bag you want to create.

    Ask yourself:

    Where will this bag be used?

    What do I want it to hold?

    Do I want it to be practical, decorative, or both?

    For example, you may want to design:

    • A small evening bag
    • A mini decorative bag
    • A casual handmade bag
    • A medium-sized everyday bag
    • A special occasion bag

    The purpose of the bag will influence many of your design decisions.

    For example, a small evening bag may focus more on elegance, while a larger bag may need stronger materials and a more practical structure.


    2. Choose the Overall Style

    Once you know the purpose of your bag, decide on its overall style.

    Your design could be:

    • Simple and minimal
    • Elegant and classic
    • Colorful and playful
    • Modern and structured
    • Romantic and feminine
    • Vintage-inspired
    • Bold and decorative

    Try to choose one main direction before selecting too many details.

    This can help your finished bag look balanced.

    For example, if you choose a simple and elegant style, you may use one or two main colors and a clean bead pattern.

    If you choose a more decorative style, you may add flowers, crystals, color combinations, or special handles.


    3. Choose Your Color Palette

    Color plays a major role in the final appearance of a handmade beaded bag.

    Before starting, choose a small color palette.

    For beginners, using two to four main colors can make the design easier to manage.

    You can choose:

    • Neutral colors for a classic look
    • Soft colors for a delicate design
    • Bright colors for a playful bag
    • Dark colors for an elegant appearance
    • Metallic details for extra decoration

    Try to think about how the colors will look together before starting the full project.

    A small test sample can help you see whether the colors create the effect you want.


    4. Choose the Right Beads for Your Design

    The beads you choose will affect both the appearance and structure of the bag.

    Consider:

    • Bead size
    • Bead color
    • Bead weight
    • Bead shape
    • Hole size
    • Surface finish

    Large beads can create a bold and structured appearance.

    Smaller beads can create more detailed patterns but may require more time and materials.

    Heavy beads can make a bag feel luxurious, but they may also increase the total weight.

    Before making your final decision, read How to Choose Beads for a Handmade Beaded Bag for more guidance.


    5. Decide on the Shape of Your Bag

    The shape is one of the most important parts of the design.

    Some popular options include:

    • Rectangular
    • Square
    • Rounded
    • Mini box shape
    • Bucket style
    • Soft pouch style

    Choose a shape that matches the style and purpose of your bag.

    A structured rectangular design may work well for a classic or elegant bag.

    A rounded shape may create a softer and more playful appearance.

    Before starting, try to imagine the bag from different angles.


    6. Plan the Size of Your Bag

    Before creating your design, decide approximately how large the finished bag should be.

    Think about:

    • Width
    • Height
    • Depth
    • Handle length

    The size should match the intended use of the bag.

    A mini bag may only need space for a few small essentials.

    A medium or large bag may require more careful planning because the additional beads will increase the weight.

    For help choosing suitable dimensions, read How to Choose the Right Size for a Handmade Beaded Bag


    7. Sketch Your Design

    You do not need to be a professional artist to create a simple bag sketch.

    Use a notebook and draw the basic shape of your bag.

    Then add ideas such as:

    • Handle position
    • Closure placement
    • Decorative patterns
    • Flower details
    • Color sections
    • Chain details

    Your sketch does not need to be perfect.

    The goal is simply to organize your ideas before you start making the bag.

    You can also write notes next to the drawing.

    For example:

    Cream beads for the main body

    Pink beads for the flower pattern

    Gold chain for decoration

    This can make the construction process easier.


    8. Plan Your Bead Pattern

    The bead pattern is what gives your handmade bag its unique appearance.

    You may choose:

    • A simple repeated pattern
    • Alternating colors
    • Horizontal rows
    • Vertical sections
    • Flower designs
    • Geometric patterns
    • Decorative borders

    Before starting the full bag, make a small sample of the pattern.

    This can help you check:

    • Whether the colors work well together
    • Whether the pattern looks balanced
    • Whether the design is easy to repeat
    • Whether the thread passes through the beads comfortably

    A small sample can save time and materials.


    9. Choose the Right Thread

    The thread is an important part of your design because it affects both the construction process and the durability of the finished bag.

    Your thread should work well with:

    • The size of the bead holes
    • The weight of the beads
    • Your chosen beading technique
    • The number of times the thread passes through the beads

    A thread that is too thick may not fit through the beads easily.

    A thread that is too thin may not provide enough support.

    For more information, see How to Choose the Right Thread for a Handmade Beaded Bag


    10. Choose the Handle Style

    The handle can completely change the appearance of your handmade beaded bag.

    Possible options include:

    • Beaded handles
    • Short handles
    • Long handles
    • Chain handles
    • Decorative handles

    When choosing a handle, think about both appearance and strength.

    A handle may look beautiful but still need to support the weight of the finished bag.

    Make sure the connection points between the handle and the bag are carefully planned.


    11. Add Decorative Details Carefully

    Decorative details can make your design more unique.

    You may add:

    • Beaded flowers
    • Crystal details
    • Metal charms
    • Chains
    • Contrasting beads
    • Decorative closures

    However, try not to add too many different elements at once.

    A good design often has one main feature that attracts attention.

    For example, you could create a simple cream-colored bag with one decorative flower design in the center.

    This can look more balanced than adding many unrelated decorations.


    12. Create a Small Test Sample

    Before making the full bag, create a small section of your design.

    This allows you to test:

    • The bead colors
    • The bead pattern
    • The thread
    • The overall structure
    • The weight
    • The spacing between beads

    You may discover that a color looks different in real life than you expected.

    You may also discover that a certain bead combination is too heavy or difficult to work with.

    Testing early can help you improve your design before using all your materials.


    13. Keep the Design Practical

    It is easy to focus only on making a bag look beautiful.

    However, a successful design should also consider practical details.

    Think about:

    • How the bag will open
    • How items will stay inside
    • How much weight the bag can carry
    • Whether the handle is comfortable
    • Whether the bag will maintain its shape

    A beautiful bag that is difficult to use may not be as successful as a design that combines style and practicality.


    14. Avoid Common Design Mistakes

    When designing your first handmade beaded bag, avoid rushing into the project without a plan.

    Common problems include:

    • Choosing too many colors
    • Using beads that are too heavy
    • Choosing the wrong size
    • Not testing the pattern
    • Using unsuitable thread
    • Creating weak handle connections

    Planning your design before starting can help prevent many of these problems.

    For more helpful advice, read Common Mistakes When Making a Handmade Beaded Bag


    Simple Handmade Beaded Bag Design Checklist

    Before starting your project, check that you have decided on:

    ☐ The purpose of the bag

    ☐ The overall style

    ☐ The color palette

    ☐ The type of beads

    ☐ The bag shape

    ☐ The approximate size

    ☐ The bead pattern

    ☐ The thread

    ☐ The handle style

    ☐ Decorative details

    ☐ A small test sample


    Final Thoughts

    Designing your own handmade beaded bag is an opportunity to combine creativity with practical planning.

    Start with a simple idea.

    Choose the style, colors, shape, size, and materials carefully.

    Then create a small test sample before starting the full project.

    You do not need a complicated design to create a beautiful handmade bag.

    Sometimes a simple combination of the right beads, colors, and proportions can create the most elegant result.

    The more projects you plan and create, the easier it will become to develop your own unique handmade beaded bag designs.
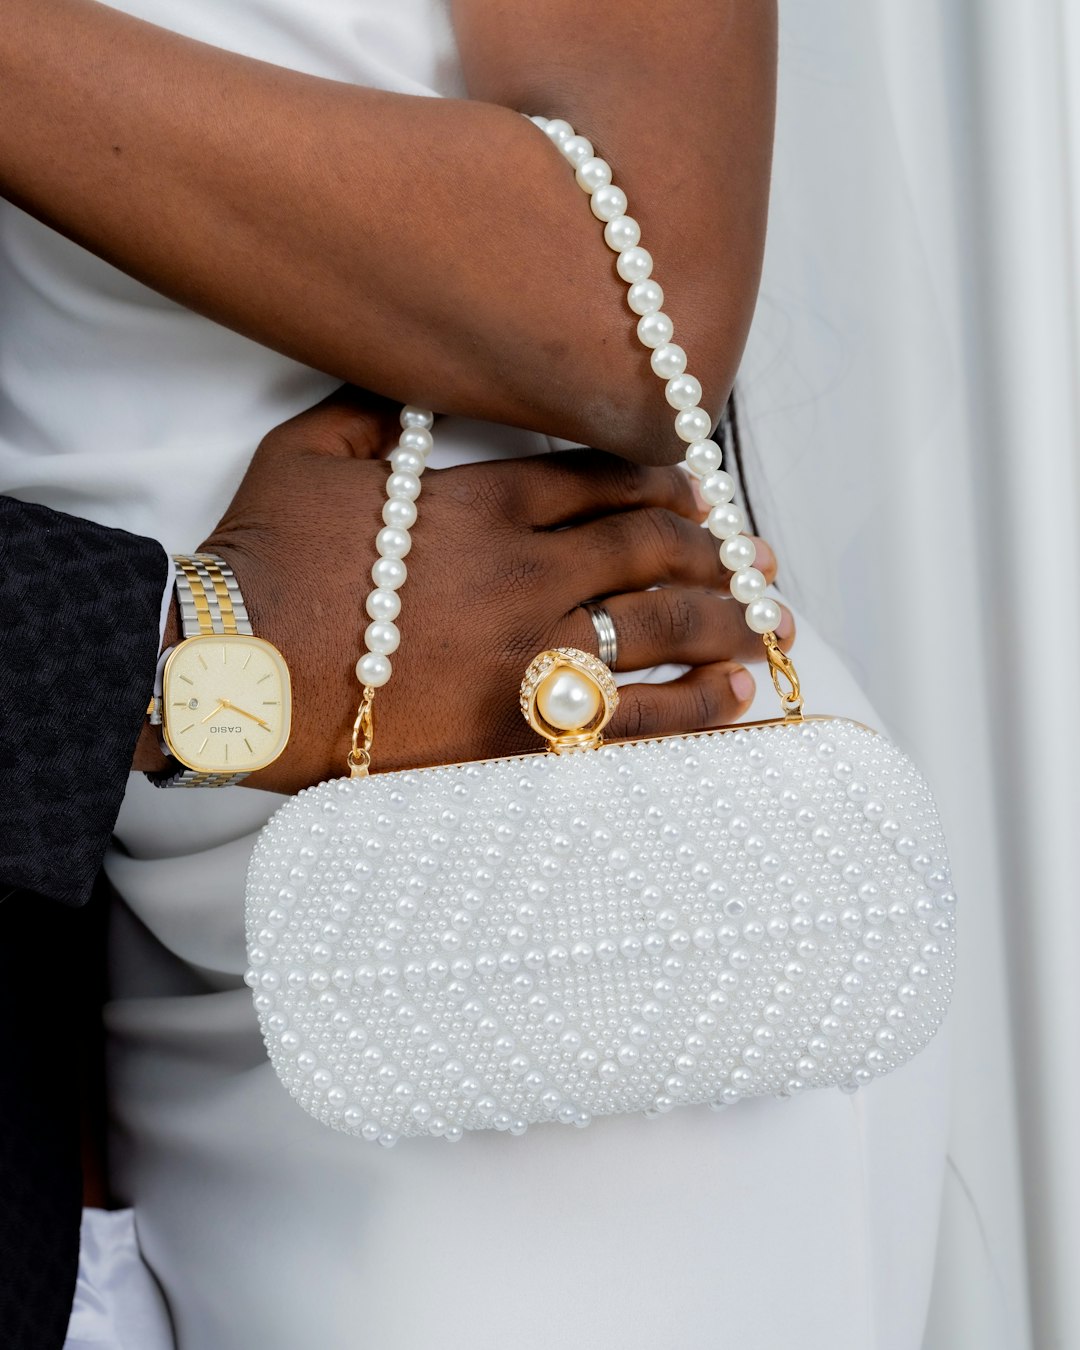

    Related Handmade Beaded Bag Guides


  • How to Choose the Right Size for a Handmade Beaded Bag

    How to Choose the Right Size for a Handmade Beaded Bag

    Choosing the right size is an important part of planning a handmade beaded bag.

    The size of your bag affects more than its appearance. It can influence the number of beads you need, the overall weight, the strength of the structure, the type of handle, and how practical the finished bag will be.

    Before starting your project, it is helpful to decide how you want to use the bag and what you want it to hold.

    This guide will help you choose a suitable size for your handmade beaded bag and plan your project more effectively.

    Before you begin, make sure you have all the basic supplies ready. You can check Handmade Bag Materials Checklist for Beginners to prepare for your project.


    1. Think About How You Will Use the Bag

    The first question to ask is simple:

    What is this bag designed for?

    The intended use of the bag should guide your choice of size.

    For example:

    • A mini bag can be ideal for special occasions.
    • A small bag can carry a few everyday essentials.
    • A medium bag can offer more practical storage.
    • A larger bag may require stronger materials and more careful construction.

    The more items you expect the bag to carry, the more important it becomes to consider the strength and weight of the finished design.


    2. Mini Handmade Beaded Bags

    Mini bags are usually designed to be lightweight, decorative, and compact.

    They can be a good choice for:

    • Evening events
    • Parties
    • Special occasions
    • Carrying small essentials

    A mini bag may hold items such as a small phone, cards, keys, or other lightweight essentials, depending on its dimensions.

    Because mini bags use fewer beads, they can also be a good project for testing a new design or color combination.

    However, even a small bag needs good structure and strong connection points.


    3. Small Handmade Beaded Bags

    Small bags offer a balance between style and practicality.

    They can be suitable for carrying a few important everyday items without becoming too heavy.

    When planning a small bag, consider:

    • The size of the beads
    • The width of the bag
    • The depth
    • The handle length
    • The type of closure

    The size of your beads will also affect the final dimensions of the bag. Larger beads can make the bag grow in size quickly, while smaller beads may require more rows to reach the same dimensions.

    To understand how bead selection affects your project, read 🟨 [[LINK: How to Choose Beads for a Handmade Beaded Bag]].


    4. Medium Handmade Beaded Bags

    Medium-sized bags can be more practical for regular use.

    However, as the size increases, so does the number of beads and the total weight.

    A medium bag requires careful planning to make sure it does not become too heavy.

    Consider:

    • Using lighter beads
    • Choosing strong thread
    • Reinforcing the handles
    • Checking the structure regularly

    The thread becomes especially important when making a larger or heavier project. For more guidance, see How to Choose the Right Thread for a Handmade Beaded Bag


    5. Large Handmade Beaded Bags

    Large handmade beaded bags can create an impressive design, but they require more planning.

    A larger bag may need:

    • More beads
    • More thread
    • Stronger handles
    • Reinforced connection points
    • More time to complete

    The weight of the finished bag should always be considered.

    Before starting a large project, create a small sample to test the weight and strength of your chosen materials.

    A beautiful bag is not always practical if it becomes too heavy to carry comfortably.


    6. Consider the Size of Your Beads

    The size of the individual beads has a direct effect on the size of the finished bag.

    For example, a bag made with larger beads may reach its desired dimensions with fewer rows.

    A bag made with smaller beads may require more rows and more time.

    Before starting, decide:

    • How large you want the finished bag to be
    • Approximately how many rows you may need
    • Whether your chosen bead size matches the design

    Creating a small sample can help you estimate the final dimensions more accurately.


    7. Think About the Weight of the Finished Bag

    The larger the bag, the more beads and materials it will usually require.

    This can significantly increase the total weight.

    Before making a large bag, think about:

    • The weight of the beads
    • The number of beads required
    • The strength of the thread
    • The type of handle
    • What the bag is expected to carry

    Planning these details early can help prevent problems later.

    For more useful tips about avoiding construction problems, read Common Mistakes When Making a Handmade Beaded Bag


    8. Consider the Bag Proportions

    Size is not only about making the bag bigger or smaller.

    The proportions are also important.

    A bag that is too narrow may not be practical.

    A bag that is too tall may lose its balanced appearance.

    When planning your bag, think about the relationship between:

    • Width
    • Height
    • Depth
    • Handle size

    A simple sketch can help you visualize the final proportions before you begin.


    9. Test the Size With a Sample

    One of the easiest ways to plan a handmade beaded bag is to make a small sample.

    For example, you can create a small section with several rows and columns.

    This allows you to see:

    • How large the beads appear
    • How much space they create
    • How heavy the structure feels
    • Whether the pattern looks balanced

    A test sample can help you estimate how many beads you will need for the full project.


    10. Choose a Size That Matches the Design

    Different designs can work better at different sizes.

    A detailed pattern may look better on a medium or larger bag where there is enough space for the design to be visible.

    A simple and elegant pattern can work beautifully on a mini bag.

    Before starting, think about whether the chosen size gives your design enough space to look balanced.

    The goal is to make sure the size, bead pattern, and overall style work well together.


    11. Think About Storage and Everyday Use

    Before choosing the size, also consider where and how the bag will be stored.

    A large bag may require more storage space and can lose its shape if stored incorrectly.

    Once your bag is finished, proper care can help it stay beautiful and maintain its shape. You may also find How to Clean and Care for a Handmade Beaded Bag helpful.


    12. Avoid Choosing a Size Without Planning

    Starting a project without deciding on approximate dimensions can lead to unwanted results.

    You may finish the bag and discover that it is:

    • Too small for your intended use
    • Too large and heavy
    • Too narrow
    • Too deep
    • Difficult to carry

    Planning the approximate size before starting can help you use your materials more efficiently.


    Quick Bag Size Guide

    Bag SizeBest ForMain Consideration
    MiniEvents and special occasionsKeep it lightweight
    SmallA few daily essentialsBalance style and practicality
    MediumMore regular useWatch the total weight
    LargeSpacious designsReinforce structure and handles

    Final Thoughts

    Choosing the right size for a handmade beaded bag is an important part of creating a successful project.

    Before starting, think about how the bag will be used, what it needs to hold, the size and weight of your beads, and the strength of your materials.

    A small amount of planning can help prevent the bag from becoming too heavy, too small, or poorly balanced.

    Creating a test sample and planning your approximate dimensions can make the entire project easier.

    With the right combination of size, materials, and structure, you can create a handmade beaded bag that looks beautiful and works well for its intended purpose.


    Related Handmade Beaded Bag Guides

  • How to Clean and Care for a Handmade Beaded Bag

    How to Clean and Care for a Handmade Beaded Bag


    A handmade beaded bag can be a beautiful and unique accessory. However, because it is made from beads, thread, handles, and sometimes delicate decorative materials, it needs proper care to stay in good condition.

    Dust, dirt, friction, and improper storage can affect the appearance and durability of a handmade beaded bag over time.

    The good news is that simple care habits can help keep your bag clean and beautiful for longer.

    In this guide, you will learn how to clean, store, and care for a handmade beaded bag while protecting its beads and structure.

    Before cleaning your bag, it is helpful to understand the materials used to make it. You can review Handmade Bag Materials Checklist for Beginners to learn more about common materials used in handmade bag projects.


    1. Check the Materials Before Cleaning

    Not all handmade beaded bags should be cleaned in the same way.

    The safest cleaning method depends on the materials used.

    For example, a bag made with plastic or acrylic beads may tolerate gentle cleaning differently from a bag made with delicate glass, pearl-style, or crystal-style beads.

    Before cleaning your bag, consider:

    • The type of beads
    • The type of thread
    • Whether the bag has a fabric lining
    • The type of handle
    • Whether the bag has metal hardware
    • Any decorative elements attached to the bag

    Understanding your materials can help you avoid using a cleaning method that may damage the bag.

    If you are unsure about different bead materials, you may find How to Choose Beads for a Handmade Beaded Bag helpful.


    2. Remove Dust Regularly

    One of the easiest ways to care for a handmade beaded bag is to prevent dust from building up.

    Use a soft, dry cloth to gently wipe the surface of the bag.

    You can also use a very soft brush to remove dust from small spaces between the beads.

    Be gentle when cleaning areas where:

    • Handles connect to the bag
    • Thread passes between beads
    • Decorative elements are attached
    • The closure is located

    Avoid pulling or pressing too hard on the beadwork.

    Regular light cleaning is usually better than waiting until the bag becomes heavily dirty.


    3. Avoid Soaking the Bag in Water

    A handmade beaded bag should generally not be soaked in water.

    Soaking may affect the thread, lining, glue, or other materials used in the construction.

    Excessive moisture can also make the bag heavier and place unnecessary stress on the structure.

    If you need to clean a small area, use a slightly damp soft cloth instead of placing the entire bag in water.

    Always use as little moisture as possible.

    After cleaning, allow the bag to dry naturally in a well-ventilated area.


    4. Clean Small Marks Carefully

    If your handmade beaded bag has a small mark or spot, avoid using strong cleaning products immediately.

    Start with the gentlest possible method.

    You can lightly clean the affected area using a soft cloth that is only slightly damp.

    Avoid:

    • Strong chemical cleaners
    • Harsh soaps
    • Abrasive sponges
    • Excessive rubbing
    • Very hot water

    Always focus on cleaning the affected area rather than unnecessarily wetting the entire bag.


    5. Protect the Thread

    The thread is one of the most important structural parts of a handmade beaded bag.

    Even if the beads still look beautiful, damaged thread can affect the strength and shape of the bag.

    When cleaning or handling your bag, avoid pulling the beadwork unnecessarily.

    Pay special attention to signs such as:

    • Fraying
    • Loose thread
    • Weak connection points
    • Beads moving more than usual
    • Loose handles

    If you are making your own beaded bag, choosing the right thread from the beginning can help improve its durability. Read How to Choose the Right Thread for a Handmade Beaded Bag for more guidance.


    6. Store Your Bag Properly

    Proper storage can make a big difference in how well your handmade beaded bag keeps its shape.

    When you are not using the bag, store it in a clean and dry place.

    Avoid placing heavy objects on top of it.

    Heavy pressure can cause:

    • The bag to lose its shape
    • Beads to become uneven
    • Handles to bend
    • Connection points to experience unnecessary stress

    If possible, keep the bag in a soft protective pouch or clean storage area.


    7. Keep the Bag Away From Excessive Heat

    Excessive heat may affect some materials used in handmade bags.

    For example, certain plastic materials, thread types, decorative finishes, or adhesives may not respond well to high temperatures.

    Avoid leaving your handmade beaded bag in places with excessive heat for long periods.

    A cool, dry storage area is usually a safer option.


    8. Avoid Overloading the Bag

    A handmade beaded bag may look strong, but it is important to consider how much weight it can safely carry.

    Carrying too many heavy items may place stress on:

    • The thread
    • The handles
    • The connection points
    • The bag structure

    Try to use the bag according to its size and intended purpose.

    A small decorative or evening bag should not be treated like a large everyday bag.

    If you are making a bag yourself, planning for weight and structure can help prevent common construction problems. You can learn more by reading 🟨 [[LINK: Common Mistakes When Making a Handmade Beaded Bag]].


    9. Check the Handles Regularly

    Handles often experience more movement and stress than other parts of the bag.

    Every so often, inspect where the handles connect to the bag.

    Check for:

    • Loose beads
    • Loose thread
    • Weak connection points
    • Uneven tension

    Finding a small problem early can help prevent more serious damage later.

    Avoid lifting a heavy bag by a handle that appears loose or weak.


    10. Protect Metal Hardware

    Some handmade beaded bags include metal elements such as:

    • Chains
    • Clasps
    • Magnetic closures
    • Decorative metal details

    These parts should also be kept clean and dry.

    Use a soft, dry cloth to gently wipe metal hardware when necessary.

    Avoid exposing metal components to unnecessary moisture for long periods.

    Keeping the bag dry and properly stored can help preserve the overall appearance of both the beads and the hardware.


    11. Keep the Bag Away From Rough Surfaces

    Rough surfaces can scratch beads or cause unnecessary friction against the thread.

    Try to place your handmade bag on clean and smooth surfaces.

    Be especially careful with delicate finishes such as:

    • Pearl-style beads
    • Crystal-style beads
    • Glossy finishes
    • Metallic finishes

    Taking a few seconds to choose where you place the bag can help protect its appearance.


    12. Check Your Bag After Regular Use

    After using your handmade beaded bag several times, take a moment to inspect it.

    Look for:

    • Loose beads
    • Damaged thread
    • Fraying
    • Loose handles
    • Changes in shape
    • Weak connection points

    Regular inspection can help you notice small issues before they become bigger problems.

    Good care is not only about cleaning the bag. It is also about protecting its structure.


    Quick Care Checklist

    Care StepWhat to Do
    DustWipe gently with a soft dry cloth
    Small marksClean carefully with minimal moisture
    WaterAvoid soaking the bag
    ThreadCheck for fraying or loose areas
    HandlesInspect connection points regularly
    StorageKeep in a clean and dry place
    WeightAvoid overloading the bag
    HeatKeep away from excessive heat
    SurfacesAvoid rough or dirty surfaces

    Final Thoughts

    A handmade beaded bag can stay beautiful for a long time when it is properly cared for.

    Regular dusting, gentle cleaning, proper storage, and avoiding excessive weight can all help protect the beads, thread, and overall structure.

    Remember that handmade bags are often more delicate than mass-produced accessories.

    Treating your bag with care can help preserve its shape and appearance while allowing you to enjoy it for longer.

    Whether you are making a handmade beaded bag yourself or caring for one you already own, understanding the materials and structure is an important part of keeping it in good condition.


    Related Handmade Beaded Bag Guides

    Handmade Bag Materials Checklist for Beginners

    How to Choose Beads for a Handmade Beaded Bag

    How to Choose the Right Thread for a Handmade Beaded Bag

    Common Mistakes When Making a Handmade Beaded Bag

  • Common Mistakes When Making a Handmade Beaded Bag

    Common Mistakes When Making a Handmade Beaded Bag

    A handmade beaded bag can look expensive even when the design is simple. Most problems do not come from a lack of talent. They come from a few early mistakes that are easy to avoid.

    Choosing beads after the design

    If you invent a pattern first and shop later, the beads you find will not match the plan. Choose the beads and the closure first, then draw the pattern around what you already have.

    Using too many colors

    Four or five colors in a small bag make the design busy. Two colors, or one color plus gold, look more elegant. Extra colors also make it harder to keep the rows even.

    Ignoring weight

    Glass beads are beautiful and heavy. A small bag can still pull on the handle or hurt the shoulder. Mix lighter beads into the sides and keep the heaviest beads on the front.


    Skipping a test row

    A test row of 10 to 15 beads shows the real size, the real color, and the real strength of the thread. Ten minutes here can save a full evening of unpicking.

    Starting too large

    A big tote in beads is a long project. If this is your first bag, make a mini clutch. You will finish it, use it, and learn faster.

    Fighting the closure

    A panel that is too wide will not sit in the frame. Measure the frame opening before you add the last rows. It is easier to add a row than to remove three rows from a finished piece.


    Weak thread on a daily bag

    An evening bag can use finer thread. A bag for everyday use needs stronger cord. If the thread starts to fuzz, stop and change it.

    No lining

    Without a lining, keys and phones catch on knots. A simple fabric insert is enough. The bag will last longer and look more finished when opened.

    Working in mixed light

    Daylight and yellow lamp light change how cream, gold, and pale blue look. Finish color decisions in one kind of light.

    Giving up at 70 percent

    Most handmade bags look messy just before they look complete. The last rows and the frame are the part that makes the piece usable. Plan one extra evening only for finishing.

    Avoid these mistakes on the next bag, and the work becomes calmer. The goal is not a perfect museum piece. The goal is a bag you can close, carry, and show.